WhatsApp Cloud API Integration: Receiving Messages From WhatsApp to Salesforce
Introduction
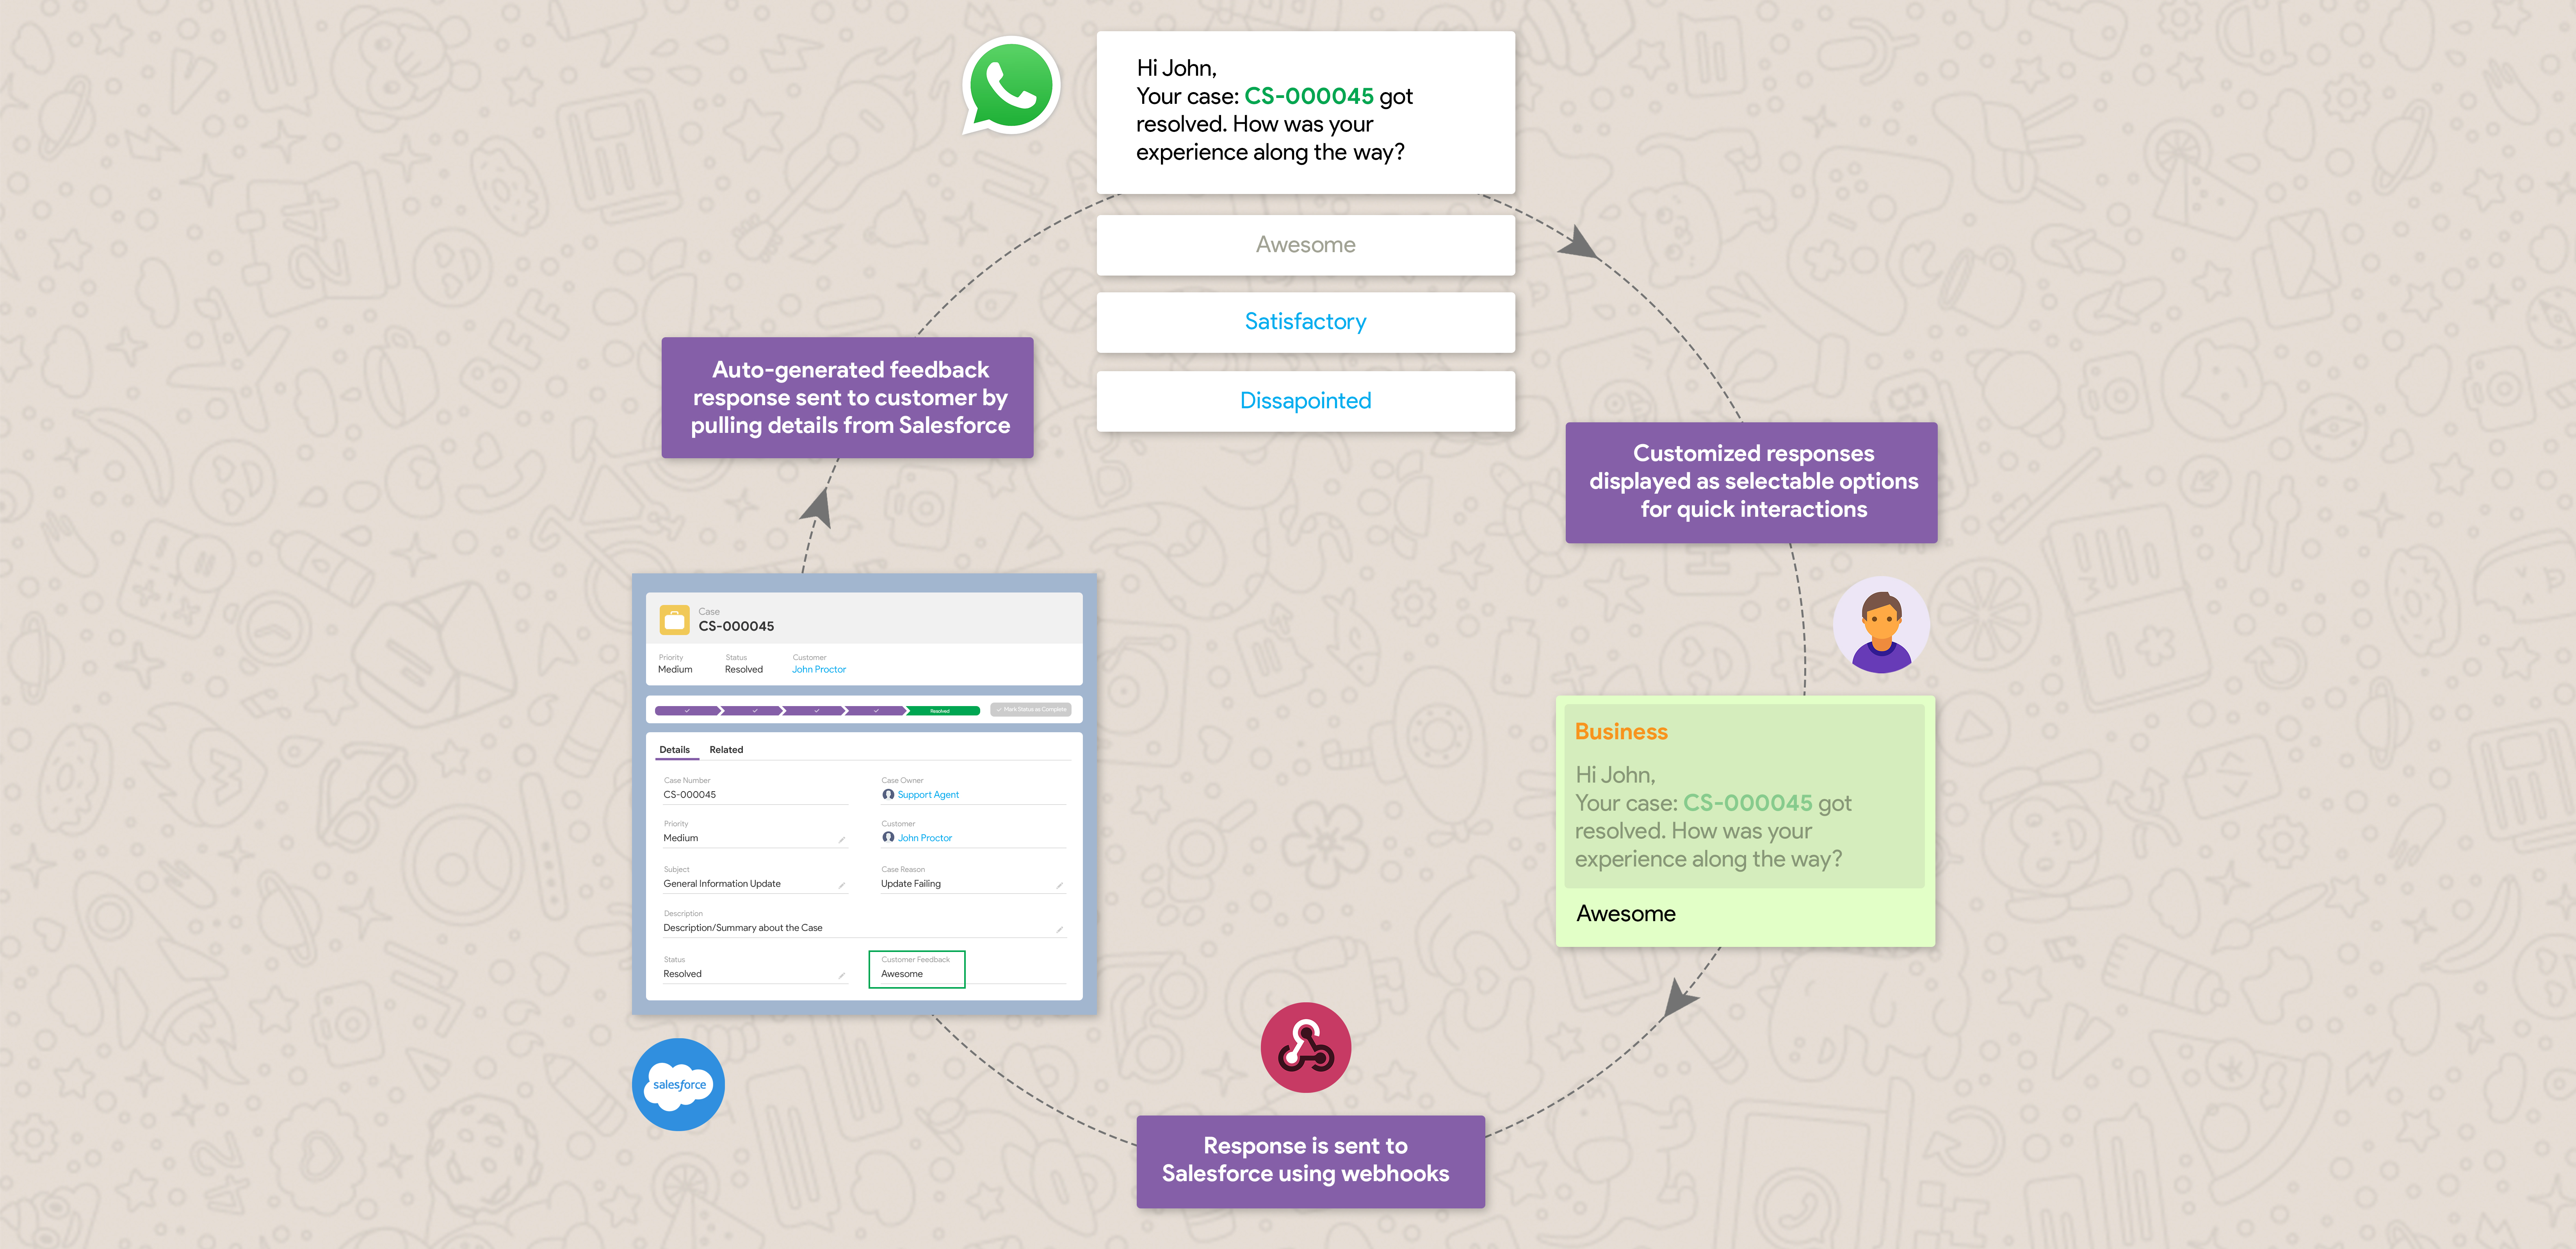
It’s time to take some action! The digital transformation is changing the way customers communicate with companies. With WhatsApp, businesses have the ability to stay on top of important business conversations, orders, and customer service issues. In our previous blogs, you have seen how to set up, access and send messages to WhatsApp using Cloud API. This guide will help you explore how to receive messages from WhatsApp so you can stay informed and have better control over messaging.
Use case
Let’s look at a situation where there is a need to connect your WhatsApp Business Account to the Salesforce instance so as to stay up to date with daily communication, and improve customer satisfaction. For this, you will have to connect your WhatsApp Business Account with Salesforce, through which the data of your customers will be updated daily and any new data related to them can be uploaded anytime. Logically, one assumes this integration can be done through Connected Apps, but what if that is not the case? What can be done? Is the world losing its mind? Is the sky falling? Don’t give in to panic just yet; take a breath and continue reading to find out the no auth mechanism in place for this integration.
How To
To get alerted in Salesforce whenever you receive a message to your WhatsApp Business Account, you need to set up a Webhook’s endpoint in your Salesforce application. Webhooks in general are special triggers that can help to get data from any system. They are triggered by some events in web applications to facilitate integration with other applications.
To handle a webhook, we need to expose an Apex REST Service that accepts and handles the HTTP Requests. When it comes to inbound integration in Salesforce, we always think of Connected Apps. But for webhooks, we cannot use Connected Apps as there is no authentication. Hence, we need to set up a public Apex REST endpoint, with no auth mechanism. Follow the steps below to achieve this in Salesforce.
Set up a Webhook in Salesforce
First, create an Apex Class and expose it as a REST Service to accept and handle the HTTP Requests.

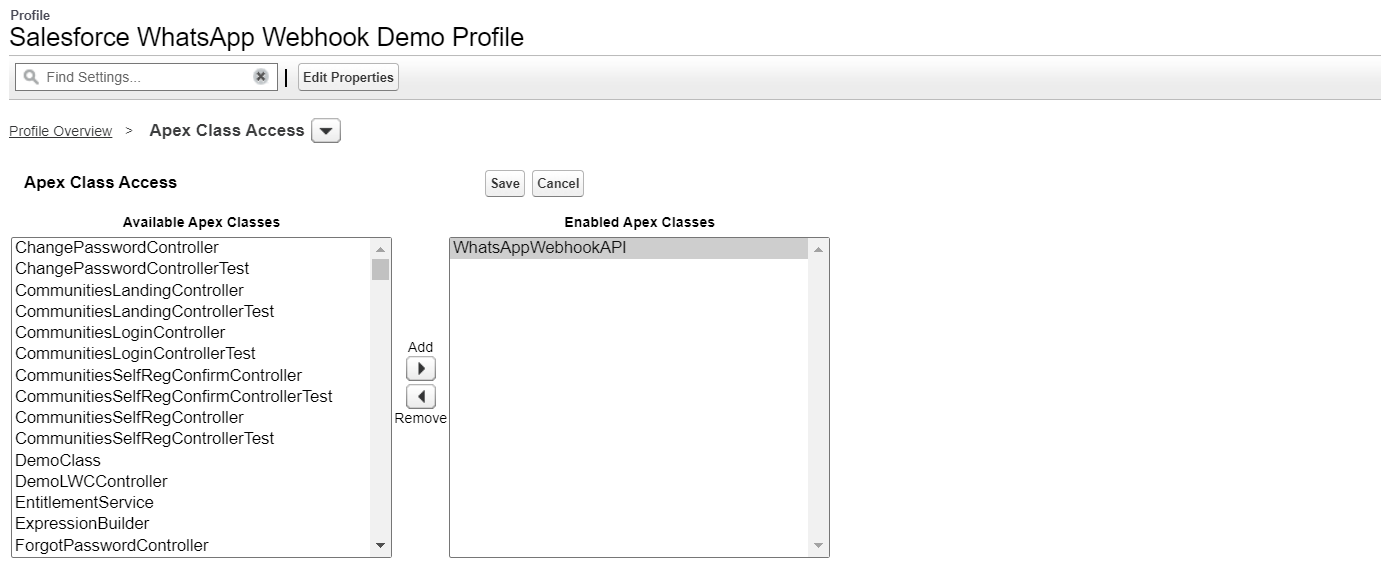
This Apex REST Service should listen to the third party (WhatsApp) with no auth mechanism. For this, you need to create a public site in Salesforce and enable the apex class access for Apex REST API (WhatsAppWebhookAPI) that is just created.
To create a public site in Salesforce, follow this link.

Now, go to the Public Access Settings, and enable access to the Apex Class.
The public endpoint URL format for an Apex REST service is {Site_URL}/services/apexrest{URL_mapping}.
In this example, the endpoint URL will be https://cp-webhook-demo-developer-edition.na163.force.com/services/apexrest/webhook. Now add this URL to your WhatsApp Business Account in the webhook section.
Configure Webhook Product in WhatsApp
Login to https://developers.facebook.com and navigate to MyApps. Select your configured WhatsApp App. This will navigate you to the App Dashboard.
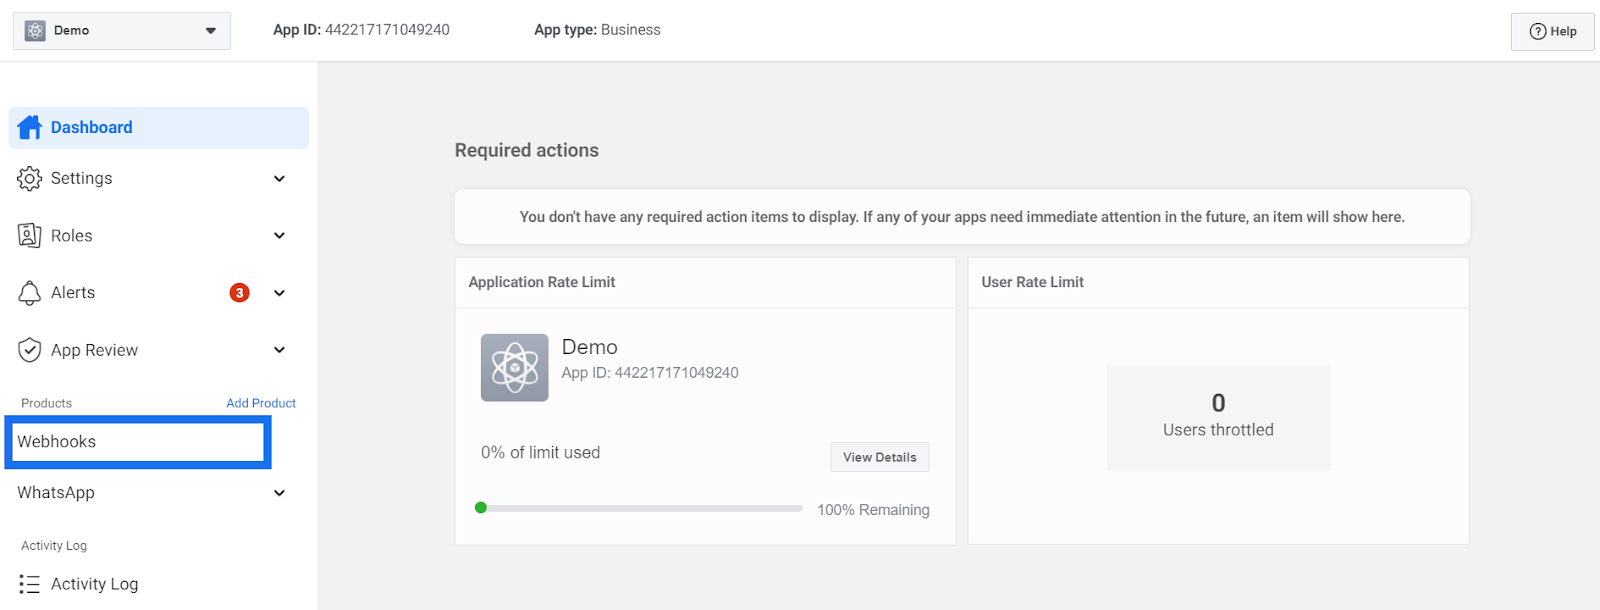
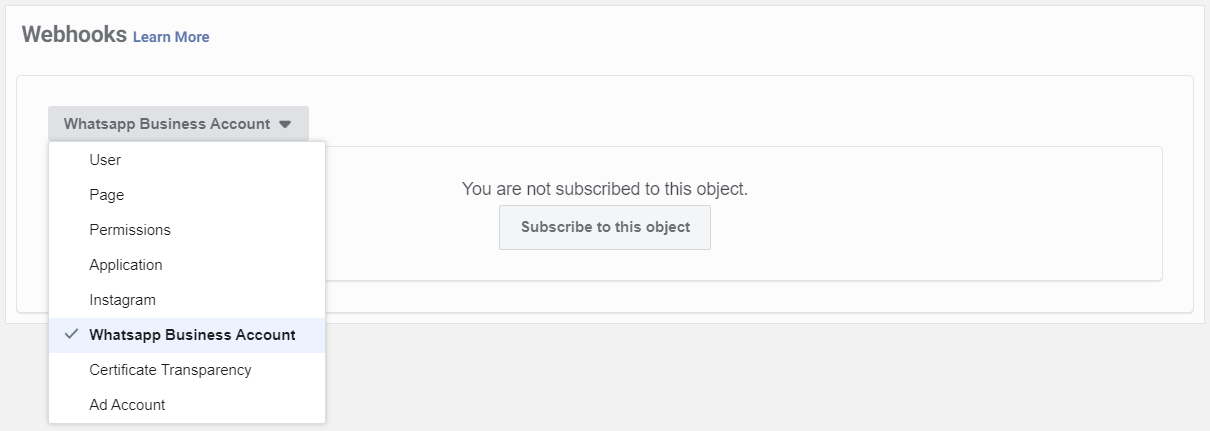
In the App Dashboard, under the Products section, select Webhooks. On the webhooks configuration page, select WhatsApp Business Account Object from the drop-down menu, and click on Subscribe to this object.
Enter the endpoint URL configured above in the Callback URL field and enter a string of your choice in the Verify Token field. This string will be sent in the Verification Request.
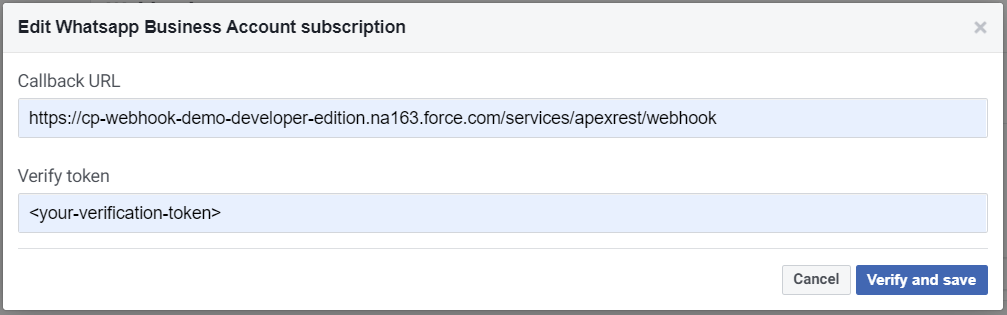
Once you click on Verify and Save, this will send a verification request (GET Request) to the endpoint configured in the Callback URL field which you must validate in the Salesforce Application.

In the verification request, the hub.mode will always be set to subscribe. The hub.challenge is an integer value and this must always be sent back in the response. When the endpoint (Salesforce) receives the verification request, verify that the hub.verify_token value matches the string you set in the Verify Token field and respond with the hub.challenge value.

On successful verification, you should be seeing the below screen where you can subscribe to the fields listed to get alerted whenever an event occurs in WhatsApp.

For example, subscribe to messages to get alerted whenever a message is sent to your WhatsApp Business Account as shown in the screenshot above. To verify webhook functionality, click on the Test button of the subscribed field. This will send a sample message request to the endpoint once you click on the Send to My Server button.

To validate the same in Salesforce, add a debug statement with the request body in doPost method and validate the same in debug logs for the Site Guest User.


Conclusion
And there you have it! A method for connecting Salesforce to an outside app, WhatsApp in this case, that can be done with Apex REST set for no auth mechanism. Our developers have yet again come up with an ingenious way to surmount a potential hair-ripping-out-of-your-head-in-chunks situation. Now you have the power to connect apps to Salesforce where even Connected Apps could not be used. Now go, and use this information to make your Salesforce instance the connected place you have always wanted it to be! Don’t forget to come back soon for more excellent insights from our talented developers.
If you are interested in learning more about how we can address your complex business needs through our innovation and thought leadership, please reach out to info@cloudperitus.com or visit our website www.cloudperitus.com.